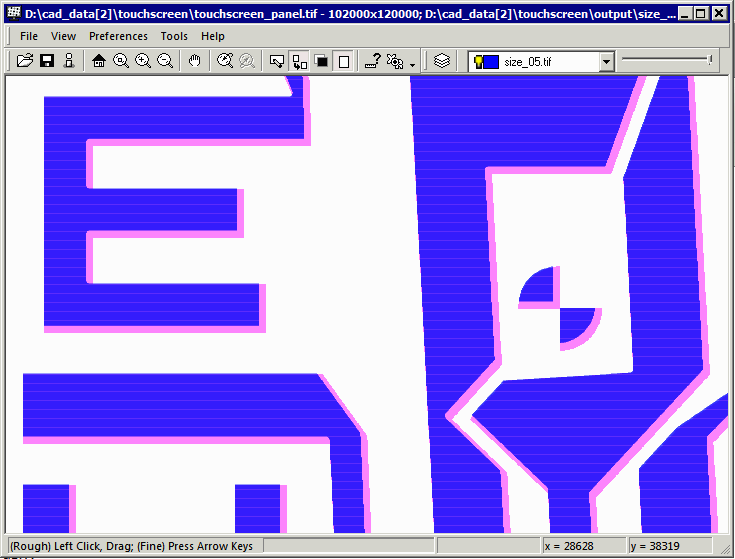
When viewing two (or three) files overlaid, it is often necessary to offset one of them. For example, to compare the results of a edge shrink to no edge shrink one can run one of Artwork's rasterizers with the shrink parameter. However unless the user also sets a fixed window size, the two output files will be very slightly different in size because the computation of the extents is done after the shrink.
In the example below the same input file has been rasterized: once with no shrink and the second time with a shrink of 0.05 mm. The DPI is 5080 (i.e. 5 um) which means that the two files are going to be about 100 microns different in overall size.

The "blue" layer is the shrunken layer; it should be symmetric around the magenta layer.
To add in an offset one first clicks on the offset toolbar button . The icon should change to a small hand. The offset can be achieved either by dragging the cursor or, for more precision use, pressing the keyboard arrow keys.
To control which layer is offset, make sure you have set the current layer in the toolbar.

We should move the shrink layer down and to the right by 10 pixels. It is easiest to do this using the arrow keys. Once this has been done the display now looks like this: