Sometimes a packaging engineer will receive a wafer map in a CSV format; however it is unlikely that the pick and place or die bonding equipment can read CSV. So it must first be converted into a map format recognized by the assembly equipment.
WMEdit (and WMBatch) support a simplified form of CSV as shown below:
139,128,8

140,128,8

141,128,8

142,128,2

.

.

.
where the first column indicates the device's X (column) position, the second column indicates the device's Y (row) position and the third column is the bin code for that device. (which could be a single ASCII character, a hex value, a pair of ASCII characters or a 3 digit integer)
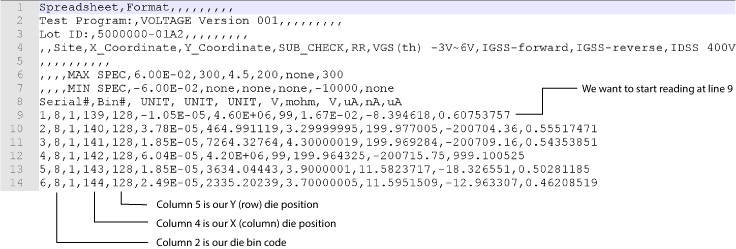
But not every CSV map file comes precisely arranged as needed by WMEdit/WMBatch. For example here is a CSV file that originated from the wafer foundry that a packaging engineer has to convert:

What to do?
a) one could open it in a spreadsheet editor such as Excel and then remove the first 9 lines; then move column 4 to column 1, column 5 to column 2 and column 2 to column 3; finally delete the remaining columns. But who wants to do that? Not only is it time consuming, but manual editing could introduce errors.
b) use the CSV.TXT file and modify the [PARAMETER] section to instruct WMEDit to ignore the first 9 rows and read the specified columns as X and Y and BIN.
We will show how to use the CSV.TXT file and modify the import parameters to support this complex CSV.
This file is located in a directory called WMConfig\WMFormats which is located under the directory where you installed WMEDit (or WMBatch). If you installed in the default directory then it would be located in:
C:\WCAD\WMEdit\WMConfig\WMFormatsC:\WCAD\WMBatch\WMConfig\WMFormatsThe CSV.TXT file contains information that the map reader/converter uses as defaults when reading/writing and converting CSV files. We will focus on the ones that control the reading of rows and columns.
[DEFINITION]

NAME=CSV

DESCRIPTION=Comma Separated Values Wafer Map

FILE_TYPE=ASCII

INPUT=YES

OUTPUT=YES

INPUT_EXTENSIONS=csv,txt

OUTPUT_EXTENSION=csv

UNITS=MM

BIN_FORMATS=ASCII-1,HEXADECIMAL-2,DECIMAL-3

NULL_BINS=.,FF,255 <-- generally no null bins in a CSV

ORIGIN_LL=

ORIGIN_UL=

ORIGIN_UR=

ORIGIN_LR=

ORIGIN_CE=

ORIGIN=ORIGIN_UL <-- assumes origin is in upper left

AXIS=ORIGIN

LOGICAL_ORIGIN=0

OFFSET_ORIGIN=YES

FLAT_ZERO=BOTTOM

FLAT_NINETY=LEFT

MULTIPLE=NO


[HEADER]


[PARAMETERS]     <-- controls row column interpretation

CSV_ROW_START=1 <-- controls row to start reading

CSV_ROW_END=  <-- controls row column end reading

CSV_COL_X=1  <-- specifies column for X die position

CSV_COL_Y=2  <-- specifies column for Y die position

CSV_COL_BIN=3  <-- specifies column for die bin code

CSV_SEPARATORS=" 	," <-- specifies delimiter(s)
So now that we know how to control the reading of the CSV, let's see what parameters work for our sample file. The illustration below will show what we want to do:

So our [PARAMETER] section will look like this:
[PARAMETERS]

CSV_ROW_START=9

CSV_ROW_END=

CSV_COL_X=4

CSV_COL_Y=5

CSV_COL_BIN=2

CSV_SEPARATORS=","
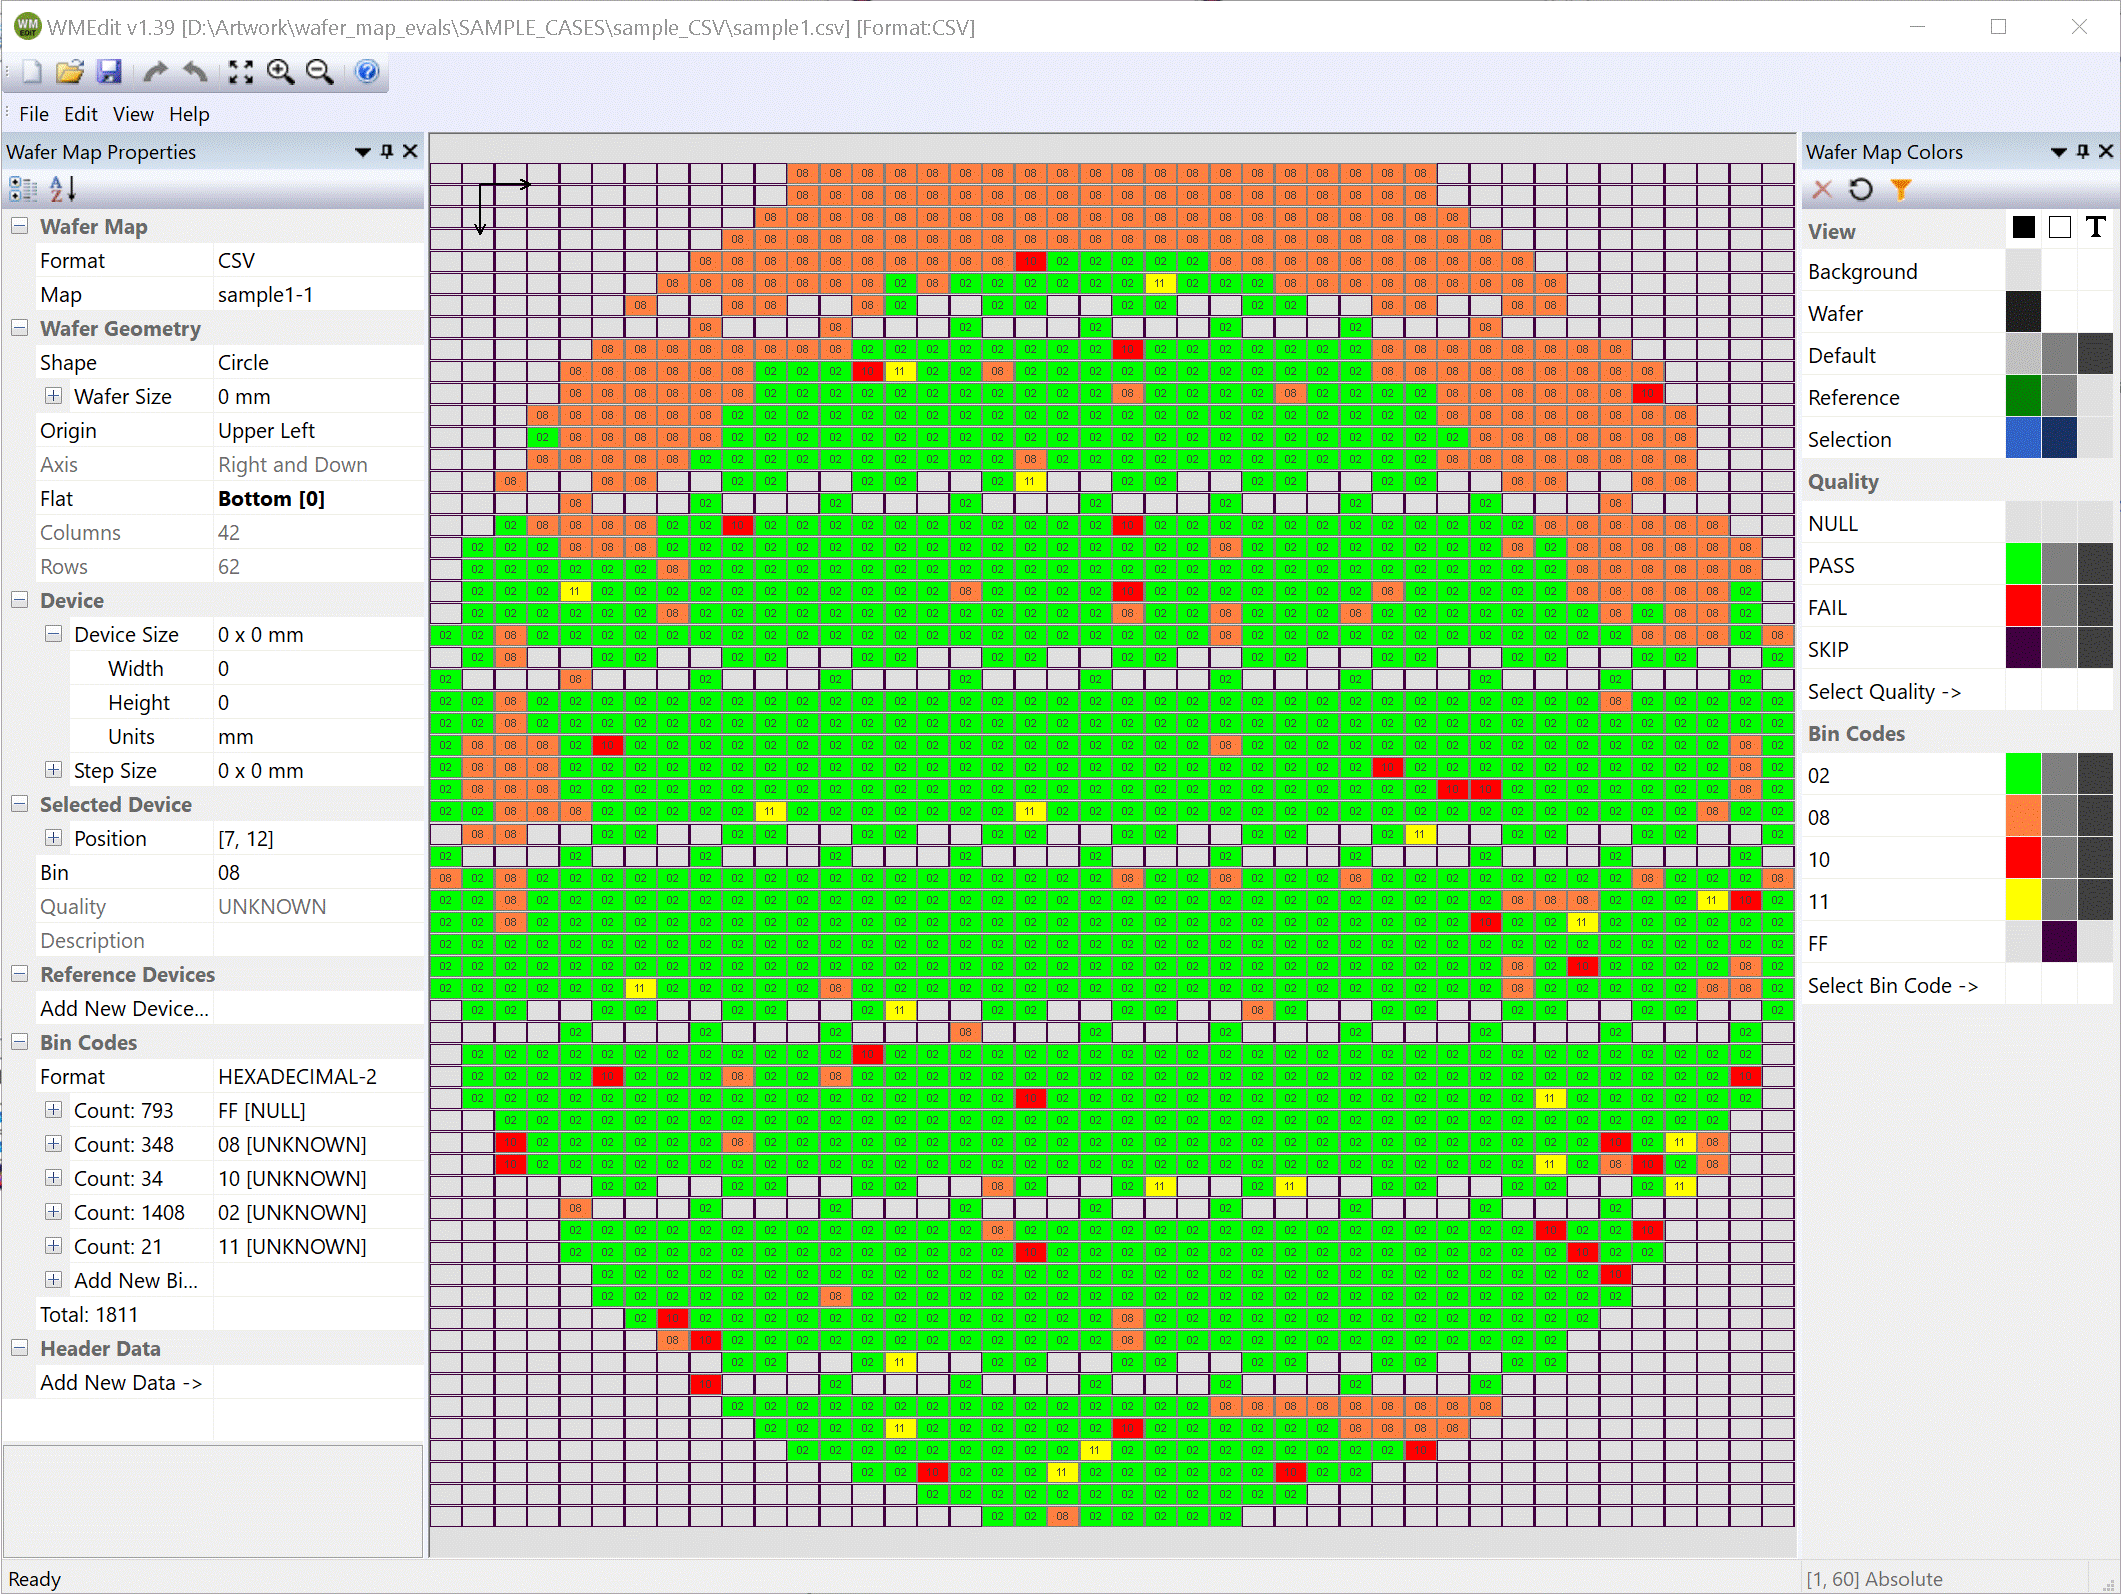
Now we can import our sample.csv file and we get the following map display.

Notes:
Before converting into another map file format the user should:
a) Enter the wafer diameter manually
b) enter the die dimensions manually
c) enter the bin code quality (PASS, FAIL, EDGE, SKIP, UGLY) manually
d) enter the LotID and WaferID manually
e) make sure the wafer flat location is properly defined
f) rotate the wafer if the flat needs to be in a different position (angle)
If you are using WMBatch, these can all be done inside of the command file as directives.