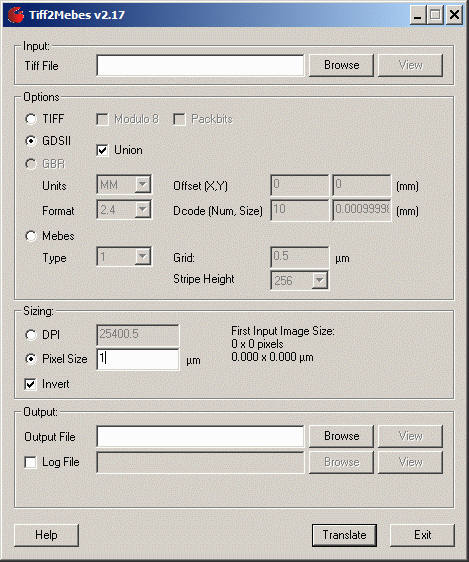
TIFF2MEBES can translate TIFF and BMP monochrome files into GDSII, MEBES and Gerber vector files. TIFF2MEBES can be run either from a simple dialog box or from a command line interface. Use the dialog box when converting a single file; use the command line interface if you wish to convert many files via batch, script or another application.
Applications include using E-Beam writers to create optical filters; also creation of archival text or images onto a substrate.
From the dialog box you can select the input and output files, MEBES, GDSII or Gerber and the version of MEBES. For early MEBES formats (1 and 2) the address grid and stripe height is fixed. For the more advanced MEBES formats (3,4,5) one has the ability to control both the address grid and the stripe height.
This page describes how TIFF2MEBES converts bitmaps into vector data.

Image size can be controlled in two ways. If you use the TIFF file's internal DPI then the image size is the number of pixels times the pixel size (1/DPI). For example a 4800 x 4800 bitmap with a 600 dpi internal value will be 4x4 inches.
The user can also set the "pixel" size manually. If you take the same 4800 by 4800 bitmap but set the pixel size to 10 um then the image will be 48,000 x 48,000 um or approximately 1.88 x 1.88 inches.
It is important that the user know both the number of pixels in the image and the DPI if you intend to use the DPI setting -- otherwise you risk generating an image that might be too large to image on the mask. A tool such as Adobe Photoshop or other pixel editor can tell you both the TIFF file's size in pixels and DPI setting.
The tiff2mebes conversion engine can be run from the command line. This enables it to be called from scripts and other applications. The command line syntax is:
tiff2mebes [options] input_file output_file
where: optional arguments are
-dpi:DPI |
|
when this option is used, the TIFF file's internal DPI setting is ignored and the user defined DPI setting is used. |
-log:LOG |
|
copies the stdout to a file or destination named LOG. |
-gds |
|
Instructs TIFF2MEBES to output GDSII stream and not MEBES. |
-path |
|
output GDSII PATHS instead of BOUNDARIES. |
-layer:L |
|
output to GDSII layer L. |
-max_allowed_size:N |
|
Remove areas less than N pixels wide/long. |
-mebes:N |
|
Instructs TIFF2MEBES to output MEBES. Five different versions of MEBES can be output: 1,2,3,4,5. |
-pixel:X |
|
instructs TIFF2MEBES to use this value (in microns) for the size of the output pixel and to ignore the DPI settings. |
-grid:X |
|
sets the MEBES address grid. Early versions of MEBES (I/II) have fixed address grids. MEBES III has a limited range of address grids (0.25,0.5 and 1.0 um) and MEBES IV/V allow a user defined grid in the range from 0.025 to 1.1 um. |
-invert |
|
Inverts the image. |
-black |
|
Pick up black index only (BMP2GDS only). |
-pw:clo,rlo,chi,rhi |
|
Extract Pixel Window ColLO,RowLO,ColHI,RowHI. See Example |
-tiff |
|
Output is TIFF (to be used with -modulo8). Special usage for TIFF to TIFF |
-modulo8 |
|
read bitmap data modulo 8 in size. |
-thrnum:number |
|
number of threads to be used. |
-log:filename |
|
appends all log files from an execution into the same log. |
-maxpts:number |
|
set the max number of points for an unionized polygon. |
-boolargs (space delimited arguments for boolw) |
|
This flag must be the last option passed. All arguments beyond "-boolargs" will be passed to "Boolw64f.exe" as arguments. |
-greystep:X |
|
use X as the greyscale quantum. See Example |
-stripeheight:S |
|
Older MEBES formats (I/II) have a fixed strip height. Newer formats allow the stripe height to be user set. Allowable values are: 256,512,1024. |
input_file |
|
name of the input file (TIFF) to convert. You can specify just the filename if it is located in the current working directory or a complete path if so needed. On Windows, you should quote the path/filename if it contains spaces i.e. "C:\My Files\test of a input file.tif". |
output_file |
|
name of the output file (and path information). |
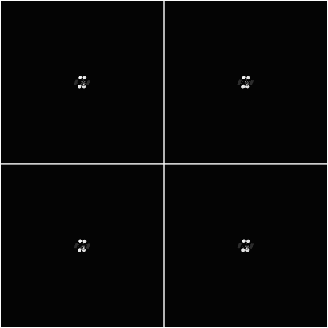
This note describes how to create a 2 x 2 reticle of a gray scale image. The reticle frame is drawn in AutoCAD and converted into GDSII. The gray scale image is converted to monochrome using Photoshop and then converted into GDSII. The reticle frame and the image are combined using GDSFILT to produce the final reticle.
